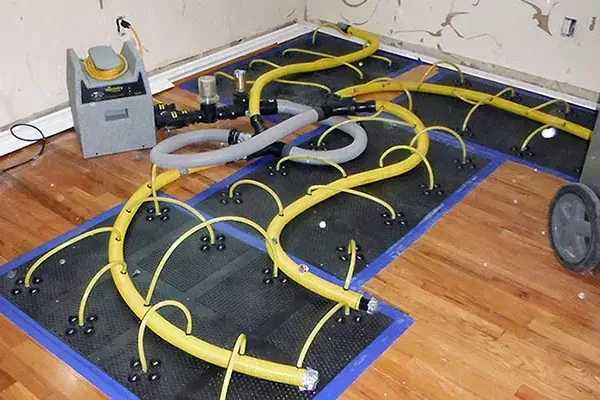
Somerset has hot, humid summers. After a plumbing or appliance leak wets a wood floor, that seasonal setting makes the indoor drying arrangement especially important. The useful questions concern the water beneath the boards, the condition of the subfloor and the room environment throughout recovery, with floor repairs scheduled around the condition of the actual materials.
Key takeaways
- Stop the leak before planning a floor finish repair.
- Record lifted edges, open seams and the original wet boundary.
- Measure both the flooring and accessible layers beneath it.
- Keep room conditions consistent with the contractor's drying plan.
- Delay sanding and finish decisions until the floor has been reassessed.
Map the floor before furniture hides the pattern
An initial floor sketch can follow the wet path from the leaking appliance or pipe to the room edges. Darkened seams, lifted board edges and water collected under furniture belong in the record.
The inspector also checks thresholds where liquid may have passed into an adjoining room with a different floor covering.
Furniture placement can obscure the first visible signs, especially beneath a low cabinet or an upholstered chair. Objects should be photographed before authorized movement, with attention to wet feet, fabric skirts and nearby rugs.
The destination for each moved item needs a dry, protected surface that will not receive transferred moisture.
The record should separate observations from planned repairs. A raised edge is an important condition to track, while the eventual decision to retain or replace a board depends on the whole assembly.
Broad photographs show the room pattern; closer views preserve individual seams and finish changes for later comparison.
- Mark the leak location and the direction water traveled.
- Include floor transitions and the space beneath rugs.
- Label photographs so later inspections can revisit the same boards.
Identify the floor layers that actually became wet
Wood flooring can conceal moisture below its finished face. The assessment identifies the board product, how it is installed and the accessible support layers before choosing a drying approach.
A visually similar floor in another room may have a different assembly and therefore need a different repair decision.
Hardwood water damage assessment should explain where measurements were taken and what those points represent. Readings at an exposed edge may help the crew investigate the underside, while comparison locations help describe conditions outside the release.
Results need the material and location labels that make them meaningful.
Access can require moving an appliance, lifting a transition or opening another appropriate inspection point. The contractor should explain the purpose of that work before it begins.
Discovering a wet layer early can prevent a finish repair from covering material that still needs extraction, drying or replacement.
Recover available water before adjusting the room climate
Liquid left between boards or beneath a loose covering adds to the amount of moisture the drying equipment must manage. Extraction tools are selected for the surface and its condition.
The team considers fragile edges, existing damage and the possibility of water beneath the finish when deciding how to work across the floor.
Floor water removal is followed by another look at the room perimeter. Water can collect near wall bases and inside cabinet recesses even after the open walking area appears clear.
Those pockets deserve their own access and moisture checks so they do not remain outside the drying plan.
Rugs and mats should receive separate handling decisions. A damp backing can hold moisture against wood, while a wet rug moved carelessly can affect a previously dry floor.
The contractor should identify where each covering will be assessed or stored and document any protection placed beneath retained furniture.
- Choose extraction methods around the actual floor product.
- Inspect cabinet recesses and wall edges after open water is removed.
- Keep wet floor coverings separated from clean storage surfaces.
Manage humid outdoor air as part of the drying setup
Opening windows changes the air that drying equipment must process. During the community's humid summer weather, the contractor should specify whether windows and connecting doors remain closed and how the occupied rooms relate to the work area.
An agreed arrangement is easier to maintain than repeated changes based on comfort alone.
Dehumidification and airflow work together within that arrangement. The equipment layout should respond to the floor's wet zones, available access and room conditions.
Concentrating heat or airflow on a visibly distorted spot without checking the rest of the assembly can make later floor assessment harder to interpret.
The household needs a comfortable, safe route through unaffected space while the wet room is treated. Cords and hoses should stay out of ordinary footpaths, and stored belongings should not block the equipment.
Any required change to access or room use should be discussed before devices or barriers are moved.
Compare readings through the recovery period
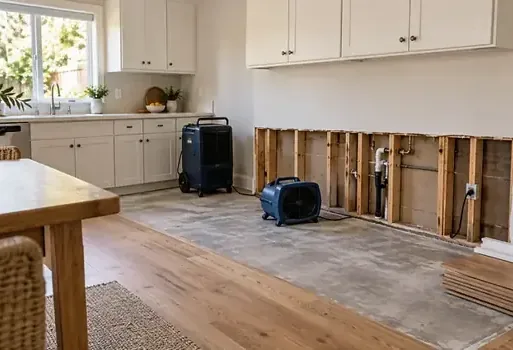
A drying log becomes useful when the measurement locations stay recognizable. Board readings, accessible subfloor readings and room conditions should be associated with dates and specific points.
The pattern over time helps reveal whether the remaining problem sits at a wall edge, under a cabinet or across a broader part of the floor.
The structural drying service should describe its material goals and the evidence used to judge progress. Comparing only the center of a room can miss the wetter edge of the release.
The crew may adjust access or equipment when readings show a section is responding differently from adjoining boards.
A stalled result calls for an explanation before the homeowner authorizes finish work. The source may need another check, an inaccessible layer may require attention, or room conditions may have changed.
Keeping the original map makes it easier to see whether the problem is shrinking, staying concentrated or spreading into another area.
- Retain the same room labels throughout the moisture log.
- Include the support layer wherever appropriate access exists.
- Record why equipment locations or drying methods changed.
Evaluate the stabilized floor before refinishing
Sanding is a finish operation, so the repair decision should follow the moisture assessment. The floor contractor needs to see the board condition after the drying work has reached its intended goal.
Distortion, damaged finishes and affected joints may lead to different decisions in different parts of the room.
The homeowner should request a clear distinction between retained boards, proposed replacement sections and any support material needing repair. A roomwide finish treatment may be discussed separately from localized removal.
Photographs and moisture records help explain why the repair boundary differs from the original puddle visible on the first day.
Matching decisions also deserve attention before materials are ordered. Board dimensions, finish appearance and transitions into adjacent rooms affect the repair plan.
The contractor should identify which existing components can remain and which decisions depend on exposing an edge or confirming the floor product beneath a removable transition.
Preserve the room setup until the handoff is complete
Moving furniture back too early can block a location that still needs inspection or press a covering against a recovering floor. The return plan should identify when rugs, heavy furnishings and ordinary room use can resume.
That plan belongs with the closing condition report rather than being assumed from the equipment removal date.
For a Somerset household, the final record should include the repaired leak, affected floor map, drying measurements and agreed finish scope. These pieces answer different questions and work best together.
The homeowner can then show the repair contractor the actual sequence without reconstructing it from scattered messages or photographs.
Any later wet spot should be recorded before another rug or furniture item covers it. The location and timing help the contractor decide what needs inspection next.
A returning symptom near the original appliance connection deserves prompt source attention even if an earlier drying and finish project has already been completed.
Questions
Does a dry floor surface mean the subfloor is ready?
The underside can retain moisture after the visible face changes appearance. The assessor needs measurements or appropriate inspection access to describe the condition of the supporting layers before closing the drying work.
Should windows stay open during drying?
Window positions should follow the equipment plan and measured room conditions. Unplanned ventilation changes can alter the environment, so the property contact should discuss any adjustment with the contractor operating the drying setup.
Can a raised board edge be sanded immediately?
A flooring specialist should assess the material after drying and stabilization. Early sanding can commit the project to a repair before the board shape and underlying moisture condition have been fully evaluated.
Which records help with partial floor replacement?
A labeled floor map, close photographs of damaged joints and the closing moisture log give the repair contractor a useful basis for defining removal limits and coordinating adjoining finishes.